


Difficulty : Beginner
Estimated Time : 30 Minutes
Software : Photoshop CS5+
Resources : Font→Familian (Download)


Step 6:
Pick the Rectangular Tool, and draw a 0.3 x 9 cm WHITE COLOURED rectangle on top of the first letter. You can check the dimensions in the Info panel (Window -> Info)

Step 7:
Now go to Go to Filter -> Blur -> Gaussian Blur and enter 2.5 for the Raduis value.And rename the layer as “blur 1”

Step 8:
Create another new layer ,create a new 1 x 9 cm rectangle over the previous one and fill the selection with white,
Then Go to Filter -> Blur -> Gaussian Blur and enter 9 for the Raduis value.And rename the layer as “blur 2”
 Step 9:
Select both blur layers then go to Layer -> Merge Layers, and rename the merged layer to “Blur”.
After that Go to Edit -> Transform -> Rotate, and rotate the blurred part as below, then press Enter.

Step 10:
Duplicate the “blur” layer and move it so that you have blur placed over each letter. Then, select all the Blur layers and merge them (Layer -> Merge Layers).
 Step 11:
Ctrl + Click the copy text layer’s thumbnail (icon) to create a selection, then go to Select > Inverse to invert the selection.
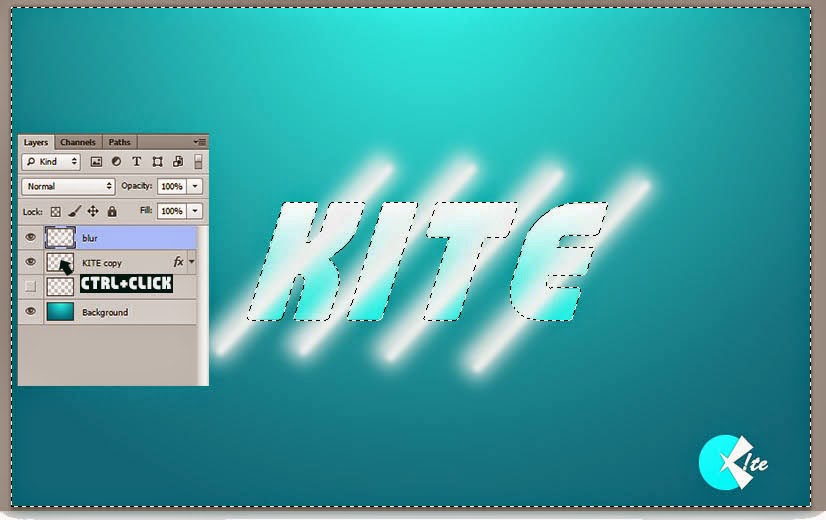
Step 12:
Press Delete to get rid of the outer parts of the blur, then press Ctrl + D to get rid of the selection.

Step 13:
Make the original text layer visible again.

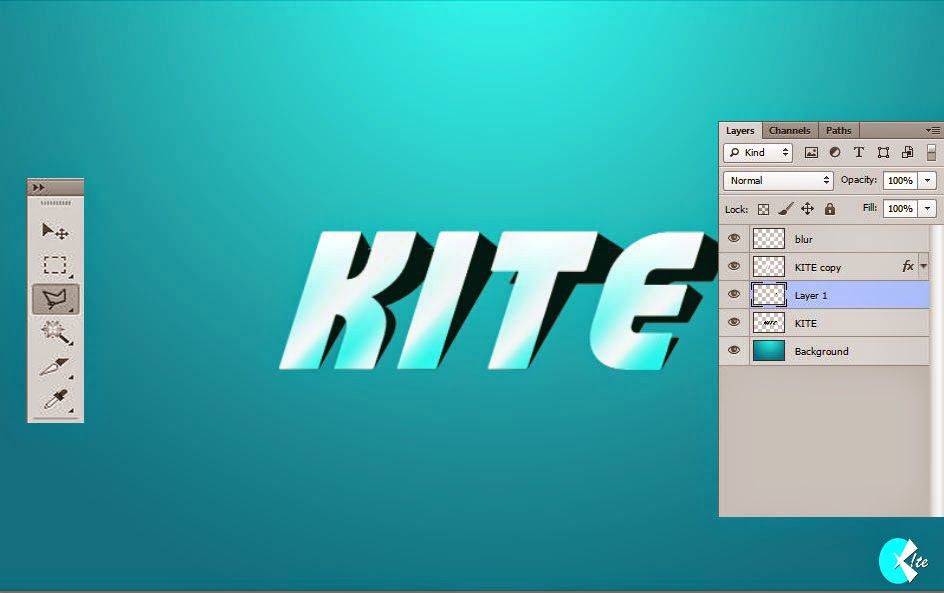
Step 14:
Go to Edit -> Transform -> Skew, and skew this text a bit more to the right. Press Enter when done.

Step 15:
Go to Edit -> Transform -> Scale, and scale the text down vertically. Don’t forget to press Enter after you do so.
 Step 16:
Make sure that the original text layer is selected (active), and click the “Lock transparent pixels” icon in the Layers panel. Set the Foreground color to BLACK and pick the Paint Bucket Tool. Un-check the Contiguous box in the Options bar then fill the white part with the Foreground color.

Step 17:
Create a new layer on top of the original text layer. Pick the Polygonal Lasso Tool and draw a selection around the empty areas between the two text layers.
AND WE ARE DONE.
We get final image that look like the below one.
 Hope you enjoyed the tutorial and found it useful..If you have any doubts free feel to comment below or contact us.