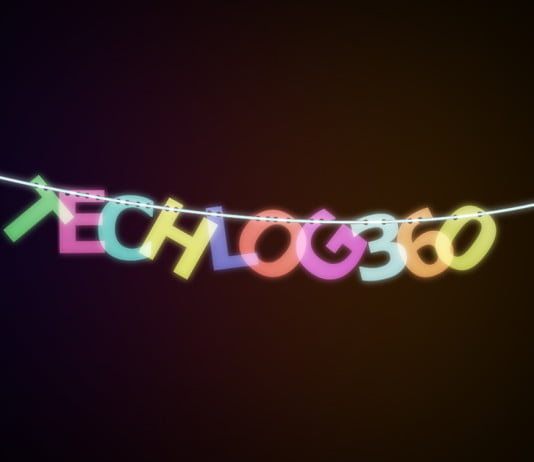
In this tutorial we are going to show you how to create a suspended text effect in photoshop.The tutorial will show you how to create a path using pen tool and how to select and edit a particular item from the document.
Reference:PhotoshopStar
So let’s start:
Difficulty : Intermediate
Estimated Time : 45 Minutes
Software : Photoshop Cs3 +
►Step 1
• Create a new document “(1000 X 700)px” with black background color.
• And create a new Text layer with following properties:
• Font : Verdana
• Font Style: Bold
• Font Size:130pt
• Font Color:#ffffff
►Step 2
• Now create a new layer above “Background” and name it as “Gradient“.
• Select Gradient Tool and set foreground color #ffffff(white) and background color #000000(black) and gradient style “Linear Gradient”
• Now drag a line from top to bottom to create a gradient effect
►Step 3
• “Ctrl + Click” on text layer thumbnail.Now you can see a selection around your letters.
• Now focus on “Gradient” layer and press “Ctrl + J” to duplicate it.And name the new layer as “TextGrad”
• And Hide Text layer and “Gradient” layer.
Now you can see gradient is applied on your text only.
►Step 4
Now we are going to select each letters of our text.
• Focus on “TextGrad” layer.
• “Ctrl + Click” on “TextGrad” layer thumbnail.
• Then select “Rectangular Marquee Tool” and enable option “Intersect With Selection“.
• And select your first letter.
Now you can see only you first letter is selected.
►Step 5
• Create a new layer above “TextGrad” and name it as “ColorText“.
• Now focus on “ColorText” layer and select any color and using “Paint Bucket Tool” fill our first selected text.
• Set Blend Mode to “Screen“.
• And last press “Ctrl + D” to deselect
►Step 6
Repeat above two steps to edit your reaming letters and you will get an image similar to below one
►Step 7
Set Opacity of both “TextGrad” and “ColorText” layers to “60%”
►Step 8
Now duplicate “TextGrad” and “ColorText” layers.
►Step 9
• First focus on original “TextGrad” layer and go to “Filter → Blur → Gaussian Blur” and set “Radius:5px“.
• Do the same effect to original “ColorText” layer too.
►Step 10
Now merge all those four layers [“ColorText,ColorText Copy,TextGrad Copy,TextGrad”].
To Merge,”Ctrl + Click” each layer and go to “Layers → Merge Layers” or press “Ctrl + E”
►Step 11
• Now focus on your merged text layer.“Ctrl + Click” its thumbnail and do the same process with “Rectangular Marquee Tool” that we done in Step 4.And select your first letter.
• After selection press “Ctrl + J” to duplicate our selected letter to new layer.
►Step 12
• Repeat the same process for each letter. Don’t forget to select the “ColorText Copy” layer after you press “Ctrl + J” each time.
• And when you done you will get duplicate copy of all letters in separate layer.
• Hide “ColorText Copy” layer to make duplicated layers visible.
►Step 13
• Now create a new layer just above the “ColorText Copy“.And name it as “Rope“.
• Select “Pen Tool” and enable Tool Mode to “Path” and draw a path as shown below.
►Step 14
• Now set foreground color to “#cff5f5”
• Then select “Brush Tool” and set “Brush Size:4px” and choose a hard round brush preset
►Step 15
• After that again select “Pen Tool” and Right Click on the Path you created and choose “Stroke Path“.
• And in small box set “Tool:Brush“.
• And then hit “Enter” to Hide Path.
►Step 16
• Press “Ctrl + J” to duplicate “Rope” layer.
• Focus on original “Rope” layer and apply “Gaussian Blur” filter again or Press “Ctrl + F“.
►Step 17
Arrange each letters on the Rope so that it looks like hanging.
►Step 18
• Now first “Ctrl + Click” on “Rope Copy” layer thumbnail to select rope.
• And then select each letter layer.
• With the help of “Eraser Tool” erase the outer edges so that the letter looks like its really hang on the Rope
• And last press “Ctrl + D” to get rid of selection
►Step 19
• Again select “Eraser Tool“.This time set its size as “8px” and choose hard round brush preset.
• And then select each letters and start erase parts where the Rope and the Letter meet.
And you will get
►Step 20
Now “Ctrl + Select” each letter layers and change its Blend Mode to “Screen“.
And we are done with our letters
►Step 21
Now we are going to give some background effects.
• create a new layer above “Background” layer and name it as “NewBg“.
• Select “Brush Tool” with “Soft Round” Brush Preset and brush some random spots on your canvas.
• Then erase the a little bit of color around letters and centre part
►Step 22
Then finally apply “Gaussian Blur” filter and also adjust opacity of “NewBg” layer
We are done…
Final Image

