In this tutorial we will show you how to rollback your Windows 10 installation to the previous version of Windows.The important file required for this process is “C:Windows.old“.Downgrade is only possible if you have this file.If you typically delete that after upgrading, or you’ve done a post-upgrade clean install of Windows 10, you’re out of luck.
Before starting the process,its good if you make sure that all your data is backed up on an external hard drive and you have your Windows 7 or 8 product keys.So now let,s start.
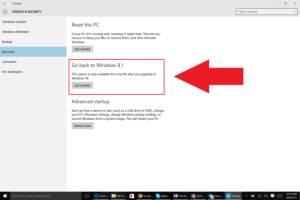
- Open the Start menu, select the Settings app, and go to Update & Security > Recovery.
- If you’re eligible to downgrade you should see an option that says Go back to Windows 8.1 or Go back to Windows 7.
- If you see it, click Get started and follow along with the wizard.
 |
| Image Credits:PCWORLD |
Once you’ve returned to your previous version of Windows, you need to tinker with it to perfect your setup once again. Older programs may need to be reinstalled, and if you had a different password on the older system than you did with Windows 10, you’ll have to sign-in with that one.
After 30 days when the rollback option is gone,and you still need to downgrade to your past operating system and Windows 10’s ,you’ll either need recovery discs generated from your original Windows 7 or 8 machine to do a clean install of your old system, or have a system image backup stashed somewhere.If that doesn’t work, your last option is to install Windows 7 or 8.1 in a virtual machine on your Windows 10 system.
