Estimated Time : 30 Minutes
Software : Photoshop Cs5 +
Contents
Photo Collage Polaroid Effect To An Image Using Photoshop
Step 1:
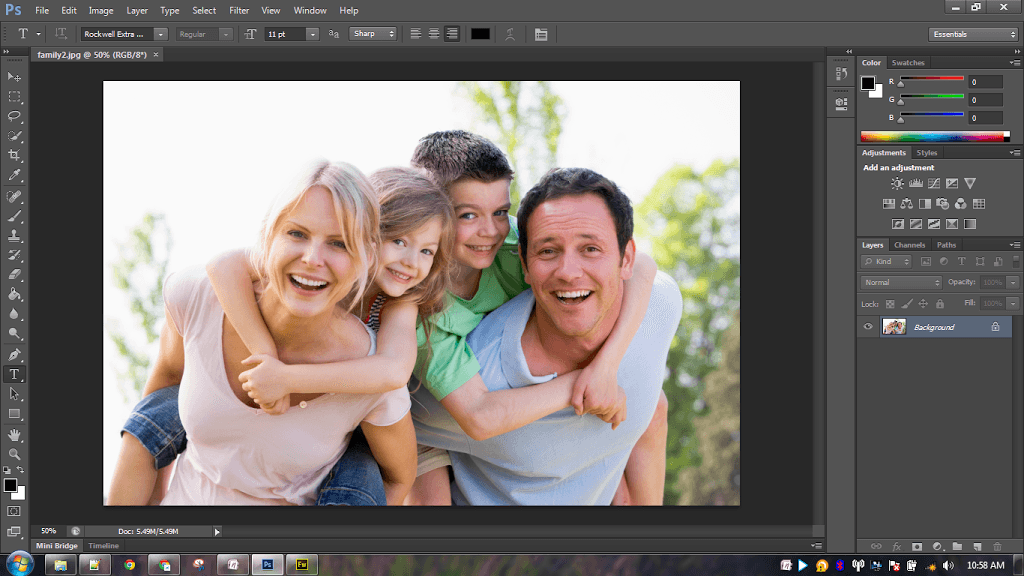
Open your image using Photoshop.
 Step 2:
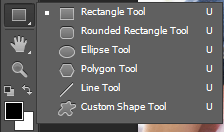
Now we are going to create our first polaroid. So select “Rectangle Tool” from Tool Panel.
 Step 3:
 Step 4:
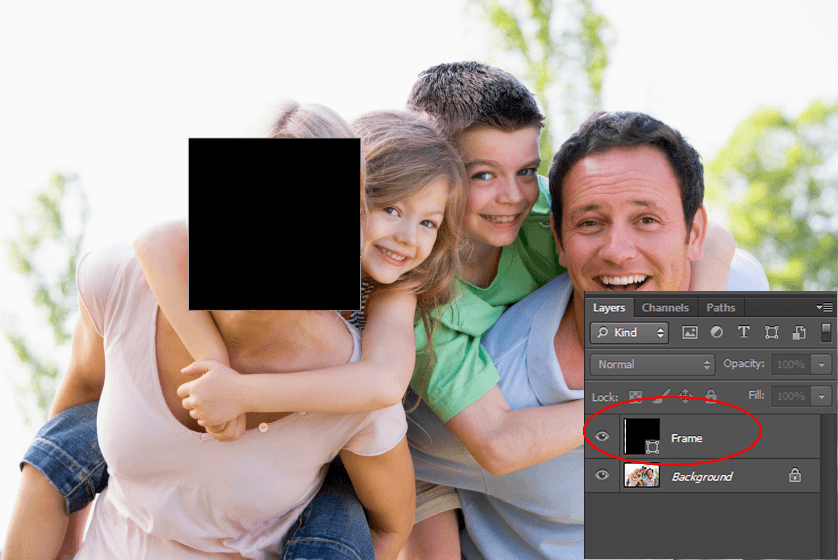
Now Press and Hold the Shift Key on your keyboard, then click and drag out your shape. Holding Shift Key while dragging will helps you to draw a perfect square shape. But make sure you release your mouse button before releasing the Shift key otherwise it won’t work. Now you will get a black square shape on your image. Rename your shape layer as “Frame”.
 Step 5:
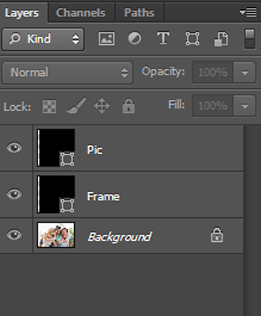
Duplicate “Frame” layer by pressing “Ctrl+J ” and rename new layer as “Pic”
 Step 6:
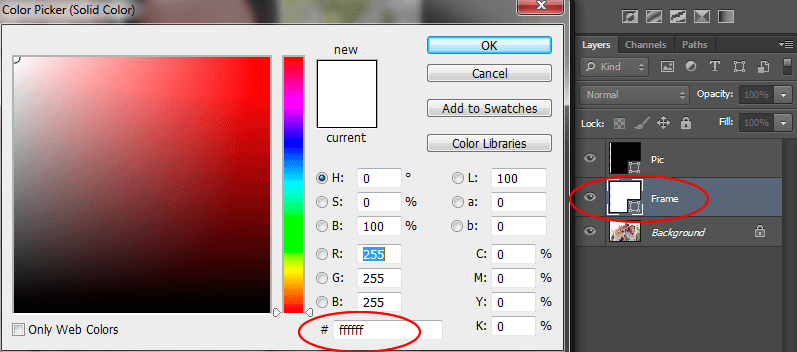
Now select the “Frame” Layer and change its color to “White“.
 Step 7:
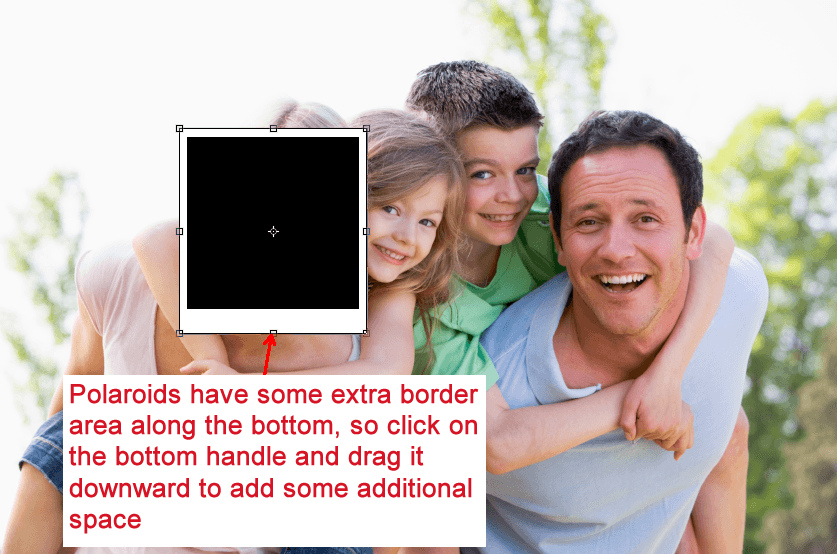
Again select “Frame” Layer and press “Ctrl+T” to Free Transform your shape. Give some extra space for bottom-border, because polaroids have it. And you will get something similar to this.
 Step 8:
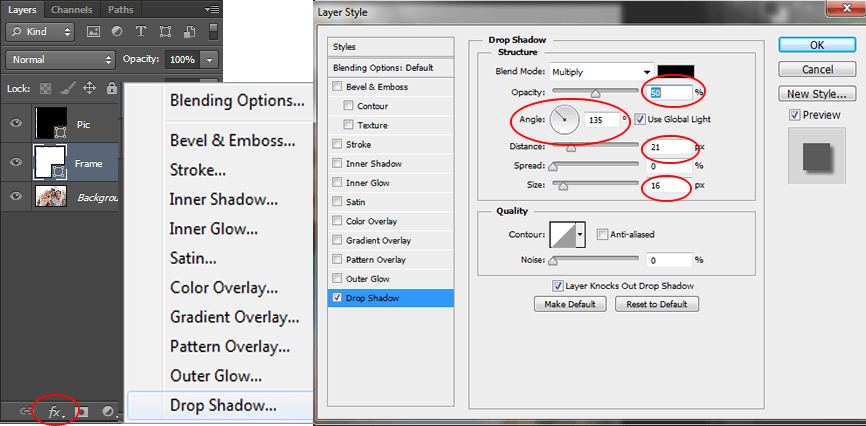
So let’s give some shadow effect to our “Frame” Layer . So choose it again and press “Layer Style” button below the layer panel and choose “Drop Shadow” and set values like below screenshot.
 Step 9:
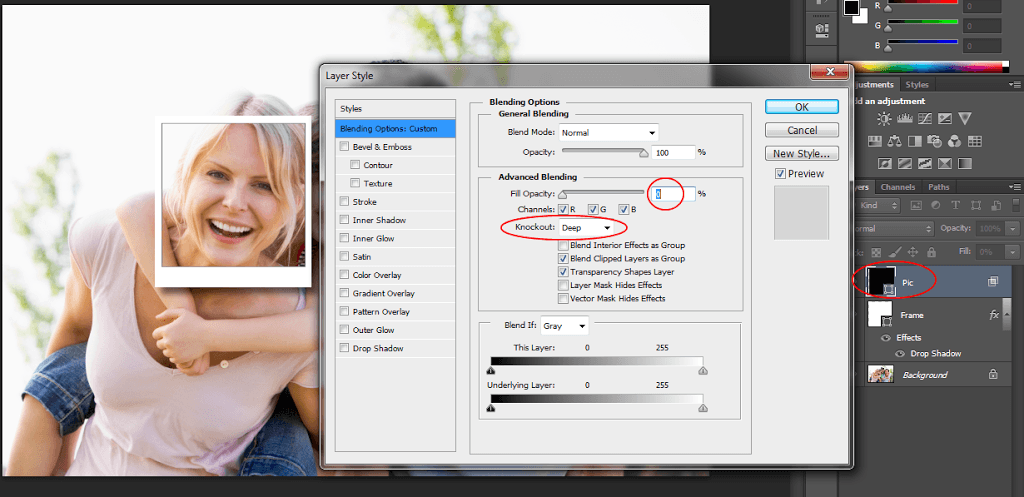
Now double click on the “Pic” layer and you will get a new window called “Layer Style” (Or Right Click the “Pic” Layer and choose “Blending Options”). And set values like below screenshot.
Yes and you got your first polaroid with white frame.
 Step 10:
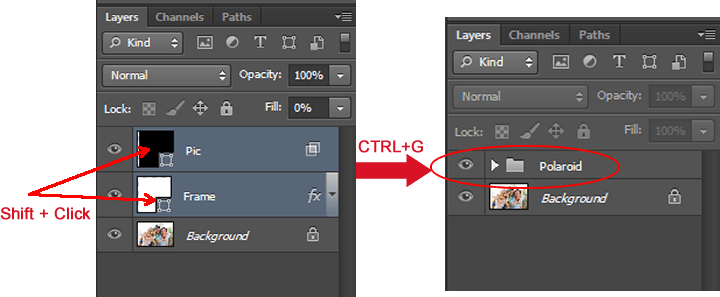
Hold Shift Key and select “Pic” and “Frame” Layers and then press “Ctrl+G” to group them. Rename the group as “Polaroid”
 Step 11:
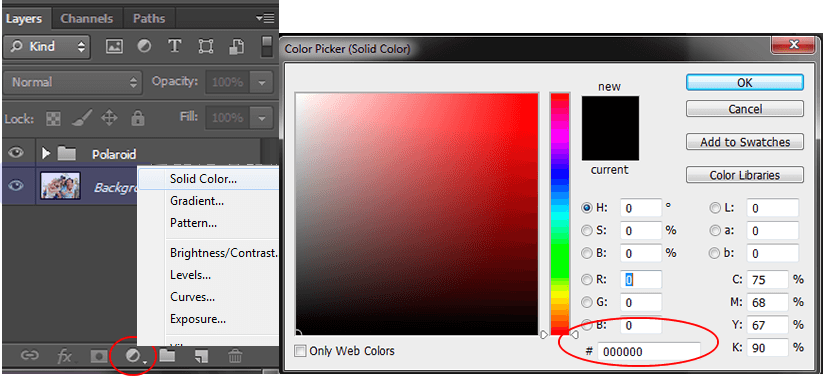
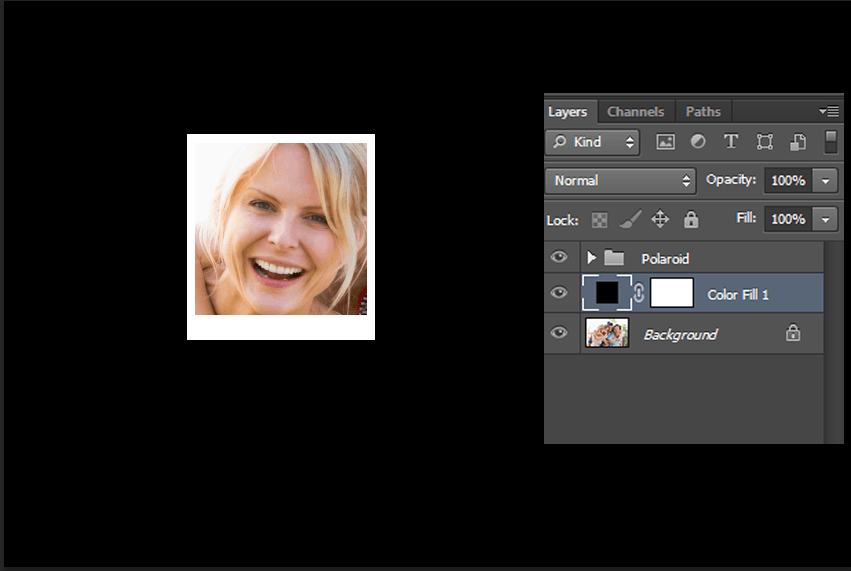
Now we are going to add more polaroids. Before that we have to hide our “Background” layer with a Solid color. So choose “Background” Layer and click “New Fill or Adjustment Layer” button on the bottom of the layer panel and choose “Solid Color” from the top of the list that appears.
Here am filling it with Black color you can choose any Solid Color.
 Step 12:
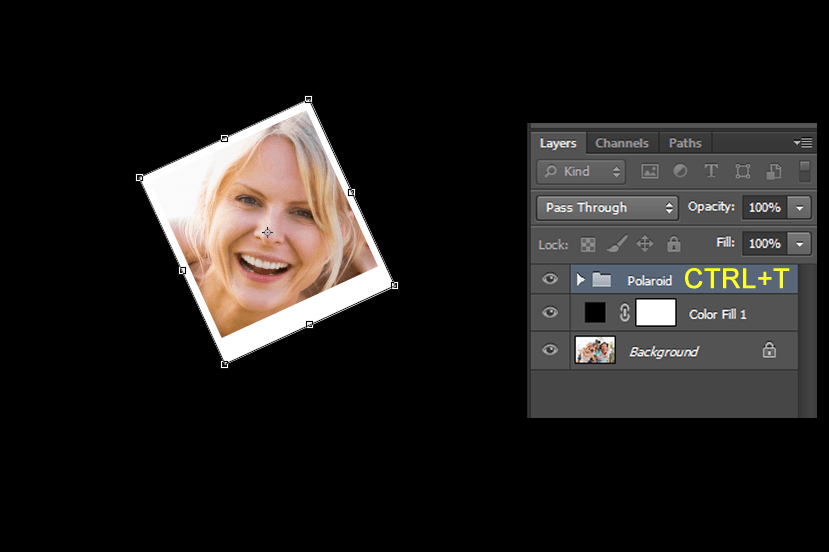
Let’s give some visual effect to polaroid. Select “Polaroid” Group and press “Ctrl+T” and rotate in some angle as you like.
 Step 13:
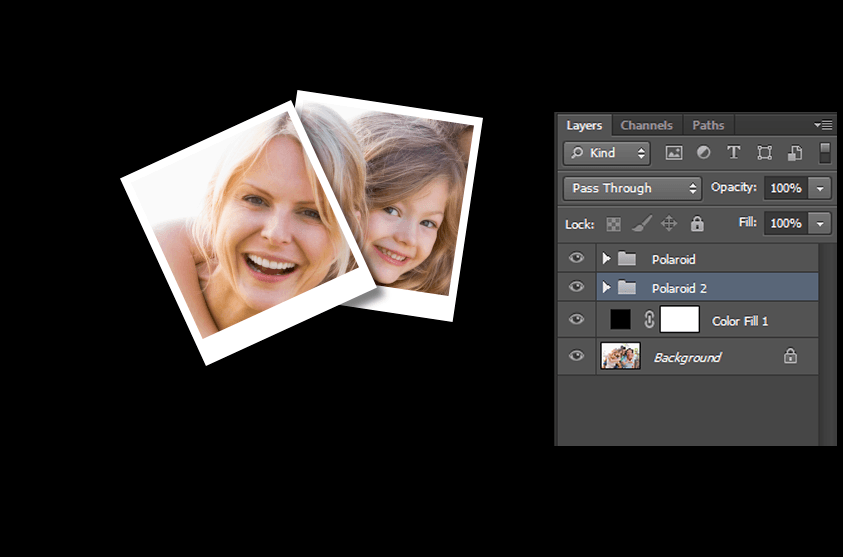
Now we are going to create more polaroids. So Copy “Polaroid” Group by pressing “Ctrl+J” and move to some other location and rotate it like we did in Step 12.
 Step 14:
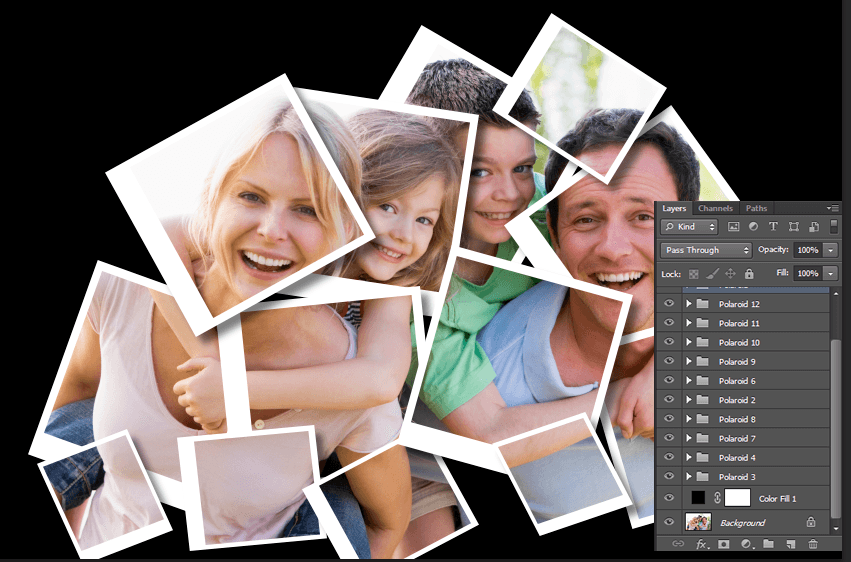
Repeat the Step 13 to create more polaroids and arrange the groups my moving up and down.
 Step 15:
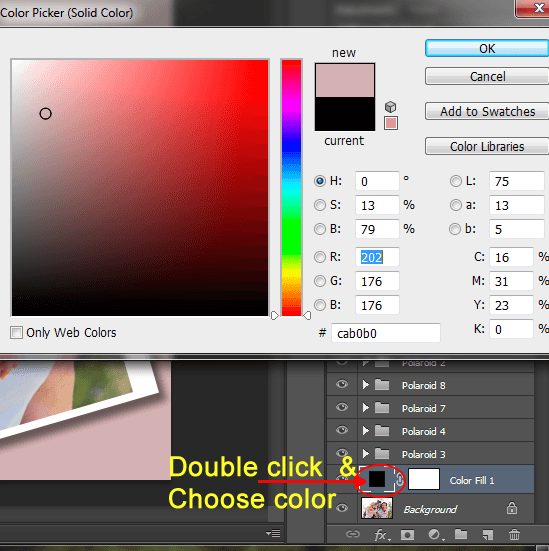
This step is optional, only do if you want to change the background color with something similar to image. Choose Filled layer and double click on solid color thumbnail and set desired color you want.
 Final Image
 |
That’s it! I hope you all enjoyed this tutorial and if you have any doubts feel free to comment


