

This is our First photo manipulation tutorial for you.This tutorial will help you to give a black & white and color mixed effects to your photos.This tutorial doesn’t require any advanced photoshop skills any beginner can do this easily.So let’s start our trip.
Estimated Time : 20 Minutes
Software : Photoshop CS6
Contents
Step 1
Open the image that you want to edit with Photoshop.
Step 2
Now you can see your image name as “Background” in Layer Tab. [Fig:1]. Double click on it and change the name as “Orginal”[Fig:2].
 |
| Fig:1 |
 |
| Fig:2 |
Step 3
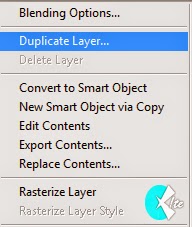
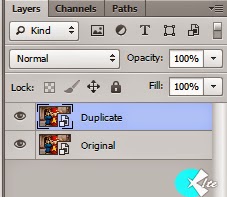
Now Duplicate the layer “Original” by Right Click Layer “Original”→Duplicate Layer. Now you have a new layer and rename it as “Duplicate”

 Step 4


 Step 5
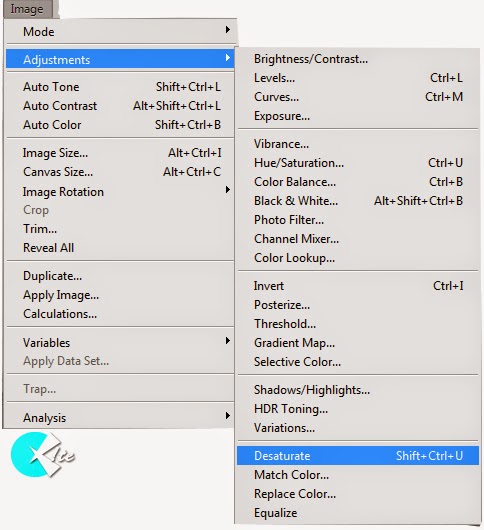
Now the image is in Black & White Format. Select Eraser Tool from Tool Panel and delete the area which you like to see in color.
 And you get image something like this ↓

 Step 6

You can also give designs to your deleting area by selecting different Eraser Pattern from Eraser menu panel.

 And final image will look some thing like this


So today you learned How To Give Black & White and Color Mixed Effects To Your Pictures Using Photoshop.This is the most easiest method to do so.If you face any problems or have any doubt please comment below.