No matter how careful you are with your Mac, it is always possible to accidentally delete important files. It’s a frustrating when it happens. Whether it’s a work document or a cherished family photo, the loss of data can be devastating. Fortunately, there are ways to recover deleted files from a Mac. In this article, we will discuss the various methods of recovering deleted files from a Mac. We will discuss each method in detail and provide a step-by-step guide to recover the deleted files from Mac. We will also share a few helpful tips to prevent data loss in the future.
Contents
Method 1. Cancel Deletion with Undo Option
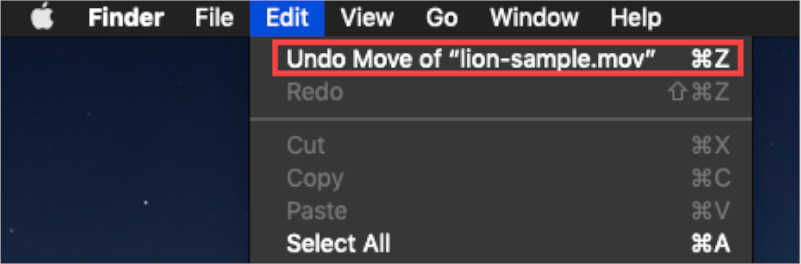
If you have deleted an important file on your Mac accidentally, you can restore them easily with the “Undo Option.” As the name implies, this command reverses your last completed action. However, you should immediately do this after removing a file. It won’t be helpful if you permanently delete the file or empty your trash.
You can recover a deleted file on Mac by following the simple steps below:
- When you delete a file, go to the “Edit” option and click on “Undo Move.”
- You can even use the command + Z option to undo your deletion.
These two methods can help you retrieve a deleted file that is not permanently deleted. After this process, you can get back your lost files. If you have emptied the trash, you can try the next method to recover your deleted files.
Method 2. Restore Deleted Files from Mac Trash Can
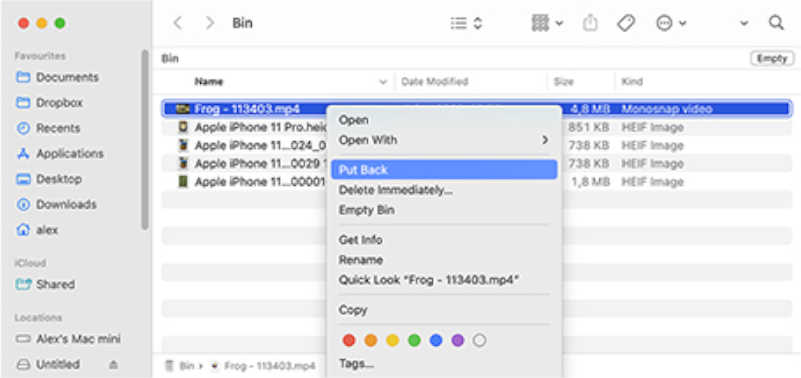
When you find a file is missing from your Mac, you should first check the Trash Can. It is a folder that stores deleted files temporarily until emptied. If the deleted file is in the Trash Can, it can be recovered to its original place with some clicks. Trash Can holds the deleted file until you do not empty it or remove it with the Mac’s “Delete Immediately” option. Your chance of recovering the deleted file from Mac will become null if you empty the Trash Bin without restoring your file to its original location.
Here is how to restore a deleted file from Trash Can on Mac:
- Go to Trash.
- Locate your file for recovery.
- Find the file based on its name, type, size, and date modified.
- Enter your file name in the Search Bar.
- On identifying your file for recovery, choose it.
- Right-click and select ‘Put Back’ for instant file recovery.
Recovering a deleted file from Trash Can is simple, but it needs you to perform suitable action. Also, not every deleted file ends up in the trash. If you did not find your deleted file in Trash, try the next option for deleted file recovery.
Method 3. Restore Deleted Files with Time Machine
Time Machine is the native application on MacOS that creates backups automatically. These backups let you restore deleted files in an emergency. Use Time Machines as a part of your routine maintenance schedule to back up your valuable data. A backup can be helpful if you find that you have deleted a file and emptied your Trash. Once Configured, this application will back up your applications and personal files regularly.
You need an external device for storage, like a USB drive or an external hard drive with enough storage space. Hook this external device up and navigate to your System Preferences. Choose Time Machine and then Select back-up disk. Also, you can choose the external drive and turn automatic backups on. Thus, users of Mac can utilize time Machine to recover files of any specific type from backups or restore their Mac to a properly working Mac OS.
To restore a deleted file with Time Machine, follow the steps below:
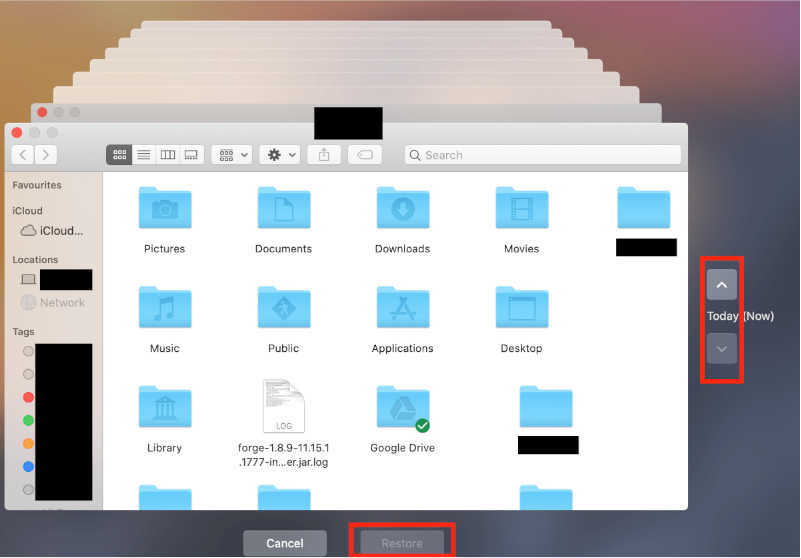
- Click time Machines from the menu bar of MacOS
- Enter Time Machine
- Navigate to the date before you deleted the file.
- Locate the file from the back-ups Finder Window.
- Preview the file, choose the deleted file, and click Restore.
- The deleted file will come to its original folder.
This method will work if you have created backups of your files previously. It is a good idea to back up important files to avoid data loss during accidental deletion, system failure, etc. Time Machine can also fail to recover some deleted files on Mac if they are damaged/ corrupt or if they were not backed up. In this case, go with the method of using data recovery software.
Method 4. Recover Permanently Deleted Files with Data Recovery.
What if you cannot recover the deleted files using Undo Option, Time Machine, or Trash? Luckily, files that are permanently deleted can be recovered on Mac. With some luck and specialized data recovery software like iBeesoft Mac Data Recovery, you can discover and recover permanently deleted files on Mac. It is a free, outstanding data recovery software that can be used to recover deleted or lost files from external storage devices and internal hard drives. It is an outstanding choice for effective and reliable data recovery solutions on Mac. iBeesoft Data Recovery allows users to scan and display all the recoverable files. The main features of iBeesoft Data Recovery For Mac include:
- Restore Lost Data In Over 500 Scenarios
- Recover Over 1000 File Formats
- Fix Corrupted Images/ Videos
- Retrieve Data From Over 2000 Storage Devices
Here is how you can recover deleted files on Mac using iBeesoft Data Recovery:
- Download and install iBeesoft Data Recovery for Mac
- Launch it
- Click “Start”
- To save your scanning time, uncheck file types
- Choose the volume and disk from where your files were deleted
- Click “Scan”
- Connect the external hard drive if you wish to retrieve files from it
- Let the scanning process complete
- Choose the target file. Click “Recover” and save the chosen file.
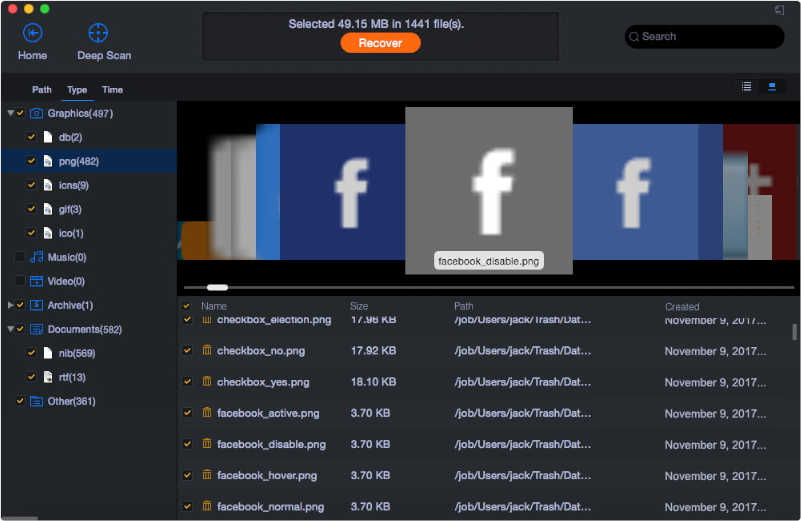
Regardless of what type of files you want to recover, this data recovery software covers you. From videos and photos to emails and documents, it supports more than 1000 file formats.
Summary
Follow the different ways mentioned above and you will have a great chance to get your deleted files back on Mac. Start the file recovery process the moment you notice any missing file as quick actions can undelete a file with just an undo command. Other methods include recovering deleted files from Mac Trash Can or using Time Machine. If none of these methods work, we recommend using iBeesoft Data Recovery for Mac. Whether you want to retrieve vital work documents or lost family photos on Mac, this software is the perfect option for comprehensive and dependable recovery.
Now you know the four best ways to restore your deleted files on Mac. If you have concluded that a few files cannot be recovered, you may think what can be done to prevent data loss in the future. Below are a few tips to avoid data loss on Mac:
- Back up the Mac
- Back up the Mac With Time Machine
- Limit useless access to The Mac
- For Extra Protection, Use Cloud Back Up
These steps are vital to protect your data on Mac. Those who don’t protect their data on Mac will end up with potential data loss.