Home Blog Page 280

How to improve productivity and stay focused on the task at hand

coding developer

In times of rapid technological advancement, regular people are daily encountered with numerous distractions. Because of this, it is sometimes difficult to stay focused on the task we are trying to complete and we find ourselves overwhelmed with unfinished work. In the following article, we will go over some of the best techniques you can use to stay focused on the task at hand, and generally improve your overall productivity.

Methods for productivity increase

Tip #1

Firstly, let’s talk about productivity while working on a long-term project or something that takes time to complete. When most people aim to complete the task at hand as fast as possible, they commit to it fully without taking any breaks. This is unquestionably the wrong way to reach maximum productivity as studies have proven that short breaks boost concentration, memory, and creativity. Consequently, working non-stop on a certain project will lead to exhaustion, stress, decision fatigue, and an overall lack of productivity. Overall, it is best to divide our work into small sections that we complete and reward ourselves by making small breaks.

Tip #2

Moving on, we’ll talk about single-tasking. If you weren’t previously introduced with the term, single-tasking is a great way to increase your general productivity by focusing on a single task at a time, fully completing it, and moving on to another task after taking a break. This method is scientifically proven to be very efficient and is progressively by more people as time goes on. It is worth mentioning that using RescueTime or Timeular is great in these situations. The two applications we previously mentioned are used to track and analyze how you spend your time during a day and how you can further improve your productivity. In addition to this, the apps offer weekly reports that will give you valuable insight into how you can spend your time more efficiently.

Tip #3

Our tip number 3 is going to be based around organizing your day in advance. Particularly, it is proven that efficiency rises when you make a to-do list of the following day. You should take your time and slowly dissect how much time you have for each activity while thriving to complete the key tasks. Don’t be a stranger to sticky notes that will remind you to stick to the routine that you’ve catered for yourself if your thoughts wander away. Additionally, it’s worth mentioning that sorting responsibilities into certain categories is efficient as well. For example, you can sort crucial tasks into a separate group and you will instantly prioritize that over some other daily activities. Lastly, you shouldn’t write unnecessary things such as making lunch, showering, or walking as you are bound to perform those activities regardless.

Tip #4

For the last tip on this list, we’ve prepared an analysis of great audio to text converter named Audext. This automatic tool is an application that will greatly improve your productivity in many ways. First, let’s analyze its key features and then we’ll explain how it can practically improve your productivity.

To begin, this application can transcript any popular audio file you need into text, which can save you a lot of time as a result. The app boasts various forms of audio forms including, but not limited to MP3, M4A, and WAV. Audext can also identify noise and voices that your speakers produce which is useful if you need to identify audio that you cannot fully comprehend or understand.

Unfortunately, it cannot transcribe video files and convert textual files to audio ones. Furthermore, it cannot convert audio files to textual ones which contain incomprehensible background noise, with the most common example being regular music files. That being said, let’s analyze practical situations in which you can use Audext to your advantage.

For example, this audio to text feature is very useful in situations in which you need to analyze and write down certain conversations, interviews, podcasts, or press conferences. Moving on, this application is very useful for students who need to write down lectures from their online classes or lessons. Additionally, it comes handy in situations where you might want to write down voice recordings or memos from another mobile device. Furthermore, psychologists or various types of medical staff can use this app as it can generally improve the quality of the services they provide.

9 Best Battle Royale Games for PC we recommend in 2020

Battle Royale Games

With the arrival of PUBG, battle royale games become one of the favorite video game genres for gamers. Now Esports are organized based on battle royale games like PUBG and Fortnite and you can’t imagine the number of streamers who daily live broadcast different battle royale games through Twitch and YouTube.

The concept of battle royale became catchy, unique and engaging — a number of players deployed to strange locations either as solo or as a squad, where players have to find weapons to fight against each other and survive till last to become the last man standing.

Battle Royale genre got a huge following base from 2018. Now we have many best battle royale games for every platform — for PC, smartphone and other consoles. Maybe we can say, after the arrival of PUBG Mobile on Android and iOS many people came to know the existence of this genre of game.

But PC still have more collection of battle royales than any other platform. And all of them are unique in their own way with different gameplay and stunning graphics. In this article, we are going to list some of the best battle royale games out there for PC gamers.

Best Battle Royale Games for PC:

1. Call of Duty: Warzone

Developer: Infinity Ward, Raven Software
Available to download: Official Website
Free to play

Call of Duty Warzone

Call of Duty: Warzone — from the world of Modern Warfare, is the latest free-to-play battle royale video game released on March 10, 2020, for the Xbox One, PlayStation 4, and PC. It comes with a massive immersive battle royale map where 150 players have to battle their way to the top — the battle has been set in the fictional city of Verdansk which combines new and fan-favorite Call of Duty locations. At launch, Warzone allowed a squad capacity of three. A solo mode was added to Warzone a week later on 17 March 2020. On 14 March 2020, Activision announced that Warzone had surpassed over 15 million downloads in the first 4 days. New Warzone players, who do not own Call of Duty: Modern Warfare, will need approximately 80 – 101GB of hard drive space for the download.

2. PlayerUnknown’s Battlegrounds

Developer: PUBG Corp
Available to download: Steam
Paid

PUBG - best battle royale games

PlayerUnknown’s Battlegrounds or popularly known as PUBG is the first game to be completely built on the battle royale foundation and it is released on December 20, 2017. For the first four months of release, over ten million rounds of Battlegrounds had been played, effectively equal to more than 25,000 man-years of time. With 4 different maps, realistic gameplay and awesome graphics, PUBG became one of its kind type of game.

3. Apex Legends

Developer: Respawn Entertainment
Available to download: Official Website
Free to play

Apex Legends - best battle royale games

Apex Legends is a free-to-play battle royale game released on February 4, 2019. The game became an instant hit — exceeded over 25 million players by the end of its first week, and 50 million within its first month. Apex Legends differs from most battle royale games by incorporating Legends, pre-defined heroes with unique abilities that fall into roles such as Offense, Defense, Support and Recon.

4. Ring of Elysium

Developer: Tencent Games
Available to download:
Steam
Free to play

Ring of Elysium - best battle royale games

In Ring of Elysium, the goal is to board the rescue helicopter which accommodates 4 people, so there could be possibly 4 winners on the game makes Ring of Elysium stand out the crowd. The game is developed by Tencent Games and published by Tencent Games and Garena and released on September 2018.

5. Fortnite Battle Royale

Developer: Epic Games
Available to download:
Official Website
Free to play

Fortnite Battle Royale - best battle royale games

Fortnite Battle Royale is free to play 100-player PvP mode in Fortnite. When it was launched, Fortnite Battle Royale became a cultural online phenomenon, with several celebrities reporting they play the game, and athletes using Fortnite emotes as victory celebrations. With the launch of the mobile version, just as PUBG Mobile, Fortnite Battle Royale also became the no.1 battle royale game.

6. Fear The Wolves

Developer: Vostok Games
Available to download:
Steam
Paid

Fear The Wolves - best battle royale games

Fear the Wolves is a competitive Battle Royale FPS by Vostok Games released on 28 August 2018 — bringing unique elements inspired by classic FPS games to the world’s hottest genre. In the game, you not only have to survive from other competitors but also escape from Chernobyl pursued by mutants, radiation, horrific anomalies, and the weather.

7. Super Animal Royale

Developer: Pixile Studios
Available to download:
Steam
Paid

Super Animal Royale - best battle royale games

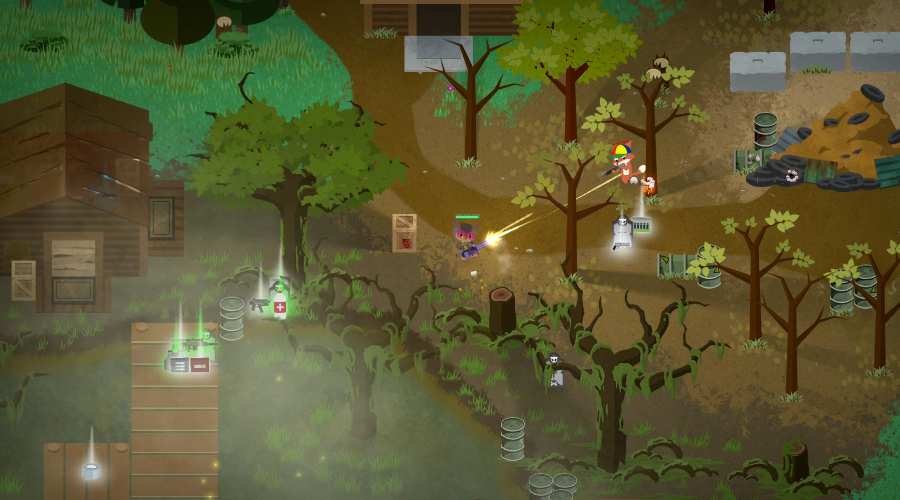
Super Animal Royale is a 64-player battle arena released on 12 December 2018. Unlike other battle royale games, in Super Animal Royale you can see anthropomorphic animals — adorably murderous fox, panda, or sloth — who use a variety of weapons and firearms from a 2D overhead perspective

8. Last Tide

Developer: Digital Confectioners
Available to download:
Steam
Paid

Last Tide - best battle royale games

Last Tide is an aquatic battle royale game released on 28 August 2018. In the game, you have to face ferocious Megalodons, Great Whites and your enemies with unique aquatic equipment and experience underwater freedom of movement.

9. Realm Royale

Developer: Heroic Leap Games
Available to download:
Steam
Free to play

Realm Royale - best battle royale games

In Realm Royale is a fantasy world battle royale, where you have to outrun the deadly fog on horseback and unleash devastating magic and forge legendary weapons to become last Champion standing.

Looking at the present trend, battle royale games are going to stay alive for a couple more years. Many new studios are experimenting to include new concepts and gameplay mode this genre. Soon we will see more battle royale games with more cross-platform support. And with the trend, we will also update this list.

Explaining The Anatomy Of A Data Breach

data breach

A data breach is the intentional or unintentional release of secure information to an untrusted environment. Other terms for this phenomenon include unintentional information disclosure, data leak and also data spill. Incidents range from concerted attack by black hats with the backing of organized crime or national governments to careless disposal of used computer equipment or data storage media.

Previously we have shared visual explanation of some of the attack vectors that could be used in the staged attack phase of a data breach such as; Cross-Site Scripting AttacksSQL Injection Attacks and DDoS Attacks.

Definition For Data Breach

A data breach is a security incident in which sensitive, protected or confidential data is copied, transmitted, viewed, stolen or used by an individual unauthorized to do so.

Data breaches may involve financial information such as credit card or bank details, personal health information (PHI), Personally identifiable information (PII), trade secrets of corporations or intellectual property

In this post with the help of infographic created by Barricade will explain visually the whole anatomy of a data breach.

data breach

How To Uninstall Linux Or Windows From Dual Boot System

Uninstall Linux Or Windows From Dual Boot System

Most of us are dual booting operating system in our computers, means installing two operating systems in separate partition instead of using VMware or VirtualBox. Mostly people installs Linux-Windows combination in dual boot system. And always messes up during uninstalling either one of this OS from their system. In this article we will show you how to uninstall Linux or Windows from dual boot system.

Most of the users use Windows version of OS in their systems, but there are some nerds who want both Linux and Windows. And after a couple of months, some of them wanted to switch to a single operating system, either Linux or Windows and most of them always break their boot sequence while uninstalling Linux or Windows. For those guys this tutorial will help, actually uninstall Linux or Windows from dual boot system is not that difficult. So let’s start :

Uninstall Linux And Keep Windows:

First method for those who wants to stick on regular Windows version and like to uninstall Linux OS from their system.

  • First go to “Start Menu” and search for “Disk Management” and open up the Disk Management tool or you can simply hit “Windows key + R” to open Run dialogue box and type “diskmgmt.msc” to open Disk Management tool.
  • Next find out your Linux partition. It won’t be labeled since Windows doesn’t understand the Linux file system, so you’ll need to figure out which one it is by size and where it is on your hard drive.
  • Before moving to next step make sure you choose right partition. Now right click on Linux partition and choose “Delete Volume“. This will delete the partition from your hard drive, leaving free space.
  • Now you can see the deleted partition in green color labeling “Free Space“. Next, locate the Windows partition near the newly available free space, right-click it, and select Extend Volume. Extend the partition so that it takes up all of the available free space. Any free space on your hard drive will remain unusable until you assign it to a partition.
  • Yes you uninstall Linux from your system but its boot loader persists. So insert your Windows recovery media and boot from it. Choose “Repair Your Computer” go to “Troubleshoot” and then enter into Command Prompt. Type the following command:
bootrec.exe /fixmbr
  • And this will remove or uninstall Linux bootloader and replace it with Windows.
  • Reboot your computer and you should find that it boots directly into Windows, with no Linux partition to be found.

Uninstall Windows And Keep Linux:

This one is for those nerds who like to be a full-time Linux user or who hate Microsoft and their spying paid operating system. Mostly process varies with distros but the common method as follows :

  • Insert a live CD or USB for your Linux distribution and start up its partition manager (like Gparted). Find your Windows partition in Gparted’s menu—it’ll be listed as an NTFS drive.
  • Right-click on that Windows partition and choose “Delete” from the menu. Your machine may have other Windows-related partitions as well, like “System Reserved” and recovery partitions. If you want, you can delete these as well (but make sure you have recovery discs handy if you’re going to delete a recovery partition).
  • Right-click on your Linux partition and choose “Resize/Move“. Resize it so it takes up the rest of the now-free space on your drive.
  • Click the “Apply All Operations” button in the toolbar to perform the selected tasks. It may give you a warning saying that your computer may not boot, but with most Linux installations this shouldn’t be a problem (though if it is, check out this article to fix it). This process may take some time, so let it be!
  • When it finishes, you should have a hard drive with nothing but Linux on it. Your boot menu will still have some Windows entries, and it’ll work fine if you leave them there, but if you want to clean things up, just open up a Terminal in Linux and run:
sudo update-grub

to remove them.

So this is how to uninstall Linux or Windows from dual boot system. If you are stuck during any process feel free to seek out our help by commenting below.

The Cost of Hiring Django Developers

coding developer

Django is a Python-based open-source web framework used in back-end development. Besides, it’s implemented to create complex and data-driven websites that require less code and low coupling. That’s why Django framework is still popular nowadays. And this fact has been proved in the research provided by Statista, where Django is included in the list among the most used frameworks in the world. So, if you want to design a highly scalable and fast app with the MVP (Model-view-presenter) pattern, consider to hiring django developers!

In our material, we are going to cover hourly rates and business cooperation models – outsourcing and outstaffing. Keep on reading it!

What Is an Average Salary of Django Developers?

Depending on experience, expertise, and geographical location, a monthly salary may be different among Django developers. This way, let’s unravel it in this section, drawing you the examples of the USA and Ukraine. According to PayScale, Python developers who are skilled at Django earn up to $67,944 per year in the USA. The maximum amount of their annual income might reach about $118,000 if you look for a senior software developer with the same skill set in this field. In contrast, the Ukrainian programmers with knowledge in Django might get nearly $1,700 per month. As you’ve noticed, salary rates vary across the globe, and you need to decide who you want to hire and which type of business partnership to choose.

How to Find Django Developers?

The hiring process of programmers with expertise in Django is complex. First, it’s important to test a candidate’s soft skills like teamwork, communication, persuasion, and much more. To do it, you need to conduct an interview with potential candidates for an open position in your company. Secondly, it’s necessary to send a task that checks hard skills. When you’ve completed all these mentioned-above stages, you can evaluate the professional qualifications of the candidates and send them a job offer.

Should You Outsource or Outstaff Django Developers?

Outsourcing and outstaffing are two business models that will be in hand if you search for developers who are experienced in Django. So, what are they? Outsourcing is a partnership model with the company, which is located outside your country. The benefits of it are price and reliability. Once you’ve decided to choose this model, you should negotiate about a deadline, scope, and a number of specialists for your project. Outstaffing is another way of hiring django developers. In contrast to outsourcing, the outside company finds programmers for you who might work with you as independent contractors. Outstaffing is a perfect choice for you if you decide to hire one or three specialists.

In conclusion, developers who are highly skilled at using Django framework will be helpful for your project. This framework enables them to generate smooth MVP features, improve time spent on processing requests, and infrastructure maintenance effectively for the app. Thus, if you seek to hire a django developer, don’t forget about the key benefits that we’ve mentioned in our article!

80 Lightweight Linux Programs To Speed Up Your Old PC

Lightweight Programs To Speed Up Your Linux PC

Sometimes its hard to replace some of our old stuffs — like our first PC.

Most of us still uses our old PC even if it can’t run new operating system. But luckily some Linux distributions out there are suitable to power up your old buddy.

But having a good lightweight Linux distro can’t guarantee smooth and faster Linux experience, since you use different other programs which utilizes more RAM. However you can speed up your old Linux PC by using it with some lightweight Linux software.

In this article we are going to list some lightweight Linux programs that will power up your old or low configured Linux computers.

Lightweight Linux Programs To Speed Up Your Old PC


Lightweight Linux SoftwareDescription
Audio Players
 Ario Ario is a GTK2 client for Music player daemon.
 Pragha Pragha is based on Gtk, sqlite, and completely written in C, constructed to be fast and light.
 Audacious Audacious plays your music without stealing away your computer’s resources from other tasks.
 DeaDBeeF DeaDBeeF is an audio player for GNU/Linux, *BSD, OpenSolaris, Mac OS X, and other UNIX-like systems
 Cmus cmus is a small, fast and powerful console music player for Unix-like operating systems.
 cplay Limited music player written in bash using mplayer features: search/play music, colorized output
 MOC MOC (music on console) is a console audio player for LINUX/UNIX designed to be powerful and easy to use.
 QMPDClient QMPDClient is Qt4 based mpd client features : Covers’ display, Lyrics’ display, Tag guessing, Internet radio and lots more.
 mpg123 A fast free MP3 console audio player for Linux, FreeBSD, Solaris, Hpux and near all other UNIX systems. Also decodes mp1 and mp2 files.
Browsers
 Midori Midori supports many of the most popular parts of the web along with  built-in privacy tools, including script disabling, third-party cookie blocking, stripping referrer details and automatic history clearing after a set amount of time.
 Vimprobable Vimprobable is a WWW browser that behaves like the Vimperator plugin available for Mozilla Firefox. It is based on the WebKit engine (using GTK bindings)
 surf surf is a simple web browser based on WebKit/GTK+. It supports the XEmbed protocol which makes it possible to embed it in another application.
Arora Arora is a cross platform web browser built using Qt and WebKit.
 Conkeror Conkeror is a keyboard-oriented, highly-customizable, highly-extensible web browser based on Mozilla XULRunner
 Dillo Dillo is a multi-platform graphical web browser known for its speed and small footprint.
 ELinks ELinks is an advanced and well-established feature-rich text mode web  browser, which is portable and runs on a variety of platforms.
 rekonq rekonq is a web browser for KDE based on WebKit with nice minimal look, lightweight approach and have advanced features.
 NetSurf NetSurf is a multi-platform web browser for RISC OS, UNIX-like platforms (including Linux), Mac OS X, and more.
 Hv3 Html Viewer 3 (hv3) is a powerful yet minimalist web browser that uses Tkhtml3 as a rendering engine and SEE (Simple ECMAScript Engine) to interpret scripts.
Email Clients
 Trojitá Enables you to access your mail anytime, anywhere without slowing down your pc.
 Alpine Alpine is a fast, easy to use email client that is suitable for both the inexperienced email user as well as for the most demanding of power users.
 Sup Sup is a console-based email client for people with a lot of ema
 Mutt Mutt is a small but very powerful text-based mail client for Unix operating systems.
 Claws Mail Claws Mail is a user-friendly, lightweight, and fast GTK based email client.
 Sylpheed  Sylpheed is a simple, lightweight but featureful, and easy-to-use e-mail client.
File Managers
 PCManFM PCManFM is the default file manager for LXDE, to be a lighter alternative to Files (Nautilus) on your GNOME desktop. It features tabbed browsing and can optionally manage the desktop background.
 Thunar Thunar is a modern file manager for the Xfce Desktop Environment. Thunar has been designed from the ground up to be fast and easy to use.
 emelFM2 It is a file manager for UNIX-like operating systems. It uses a simple and efficient interface.
 Vifm Vifm is an ncurses based file manager gives you complete keyboard control over your files without having to learn a new set of commands.
 Ranger Ranger is a file manager with an ncurses interface. It is designed to give you a broader overview of the file system by displaying previews and backviews, dividing the screen into several columns.
 ROX ROX is a fast, user friendly desktop which makes extensive use of drag-and-drop.
File Archiving Tools
 Squeeze Squeeze is a modern and advanced archive manager for the Xfce Desktop Environment.
 Xarchive Xarchive is a GTK+ 2 front-end for various command line archiving tools.
 Xarchiver Xarchiver is a lightweight desktop independent archive manager built with the GTK+2 toolkit.
Image Editors
 Fotoxx Fotoxx is a free open source Linux program for image editing and collection management.
 mtPaint mtPaint is a painting program from scratch that could easily create pixel art and manipulate digital photos.
Image Viewers
 Mirage Mirage is a fast and simple GTK+ image viewer.
 GPicView GPicView is a simple and fast image viewer for X. Made by the developers of LXDE.
 QIV Quick Image Viewer is a very small and pretty fast gdk/Imlib image viewer.
 GQview GQview is an image viewer for Unix operating systems (developed on Linux). It’s key features include single click file viewing, external editor support, thumbnail preview, and zoom features. Some image management features are also included.
 Geeqie Geeqie is a lightweight Gtk+ based image viewer for Unix like operating systems.
Login Managers
 Qingy Qingy is ultralight and very configurable graphical login independent on X Windows.
 CDM CDM provides an ultra-minimalistic, yet full-featured login manager written in bash.
PDF Tools
 Xpdf Xpdf is a viewer for Portable Document Format (PDF) files.
Terminals
 LilyTerm LilyTerm is a terminal emulator based off of libvte that aims to be fast and lightweight, Licensed under GPLv3.
 st st is a simple terminal implementation for X.
 ROXTerm ROXTerm is a terminal emulator intended to provide similar features to gnome-terminal, based on the same VTE library.
 Xterm The xterm program is a terminal emulator for the X Window System.
 RXVT RXVT is a terminal emulator for X11. It is a popular replacement for the standard ‘xterm’.
Text Editors
 Leafpad Leafpad – GTK+ based simple text editor
 ACME Acme is a powerful text editor, development environment and textual-user-interface platform.
 Vim Vim is a highly configurable text editor built to make creating and changing any kind of text very efficient.
 Beaver Beaver is an Early AdVanced EditoR.
 Sam A minimalist text editor with a graphical user interface, a very powerful command language and remote editing capabilities.
 Geany Geany is a text editor using the GTK+ toolkit with basic features of an integrated development environment.
 Medit Medit is intended to be a useful programming and around-programming text editor.
 PyRoom PyRoom is a free editor that stays out your way – and keeps other things out of your way, too.
Torrent Clients
 Deluge Deluge is a lightweight, Free Software, cross-platform BitTorrent client.
 aria2 aria2 is a lightweight multi-protocol & multi-source command-line download utility. It supports HTTP/HTTPS, FTP, SFTP, BitTorrent and Metalink.
 Transmission Transmission, A Fast, Easy, and Free BitTorrent Client.
 qBittorrent The closest open source (GNU GPL v2 license) equivalent to µtorrent
 RTorrent rTorrent client uses ncurses and is ideal for use with tmux, screen or dtach. It supports saving of sessions, allows the user to add and remove torrents and many more.
Video Players
 Parole  Parole is a lightweight and minimalist option that keeps the focus on what you’re watching.
 Gnome MPlayer Gnome-Mplayer is a simple GTK-based GUI for mplayer without heavy Gnome dependencies
 SMPlayer SMPlayer is a free media player for Windows and Linux with built-in codecs that can play virtually all video and audio formats.
 Videos Videos is a video playback application designed to work with GNOME 3. It’s based on Totem, the original GNOME video playback application, which has been included in GNOME since 2.10.
  MPlayer MPlayer is a movie player which runs on many systems.
Word Processors
 AbiWord AbiWord is a free word processing program similar to Microsoft® Word. It is suitable for a wide variety of word processing tasks.
 WordGrinder WordGrinder is a Unicode-aware character cell word processor that runs in a terminal.
Other Linux Lightweight Tools
 Orage Orage is a new modern calendar application for the Xfce Desktop Environment.
 Calcurse Calcurse is a calendar and scheduling application for the command line.
 Remind Remind is a sophisticated calendar and alarm program.
 Todo.txt Todo.txt manages your Todo list from the command line.
 Conky Conky is a free, light-weight system monitor for X, that displays any kind of information on your desktop.
 htop An interactive process viewer for Unix systems. It is a text-mode application (for console or X terminals) and requires ncurses.
 PyPanel PyPanel is a lightweight panel/taskbar written in Python and C for X11 window managers.
 Docker Docker is a docking application (WindowMaker dock app) which acts as a system tray for KDE and GNOME2.
 Awesome Awesome is a highly configurable, next generation framework window manager for X.
 GnumericGnumeric is an open-source spreadsheet program.
 Shotwell Shotwell is a photo manager for GNOME 3.

That’s it for now — soon we will add more lightweight Linux programs..

And also if you know any other lightweight software for Linux please comment below.

A Complete Guide On How To Recover Deleted Data On Mac

Recover Deleted Data On Mac

Do you have some important data on your Mac that you want to recover? Wondering how you can do this process and if it is possible? If you have the same questions like these, then this is for you. This post will show you ways on how to recover deleted data on Mac computer.

Mac is one of the most trusted brands when it comes to computers because of its high-quality performance and amazing features. Selling Apple products also brings good value. That is why a lot of people tend to have this computer. And also, Mac comes with a large storage space that will allow every user to save as much data as they want as long as they do not reach the limit of its space.

However, just like any other computer, accidents also happen to a Mac product. And one of the most common scenarios that most users experience is losing their important data on their Mac. And with that, a lot of users are having the question if there is a way for them to recover those deleted data on their Mac.

Well, the answer to that question is yes. There are several ways on how to recover deleted data on Mac. And these methods are known to be very easy that you can do it on your own. So, to know more about the ways on how to recover deleted data on Mac, go ahead and keep on reading this post.

Part 1: How to Recover Deleted Data on Mac Using FoneDog Data Recovery

In this first method that we are going to show, it does not matter if how the files from your Mac got deleted or the reason behind it. The FoneDog Data Recovery is a third-party app that you can use in order for you to know how to recover deleted data on Mac the safest, easiest, and quickest way possible.

Through the use of the FoneDog Data Recovery, you will be able to recover deleted data on your Mac such as your audios, emails, photos, documents, videos, and more. Through this tool, you will be able to recover even from the Recycle Bin of your Mac. And aside from that, you can also recover lost or deleted data from other external devices such as your flash drive, external hard drive, and memory cards.

The FoneDog Data Recovery software is as we said, very easy to use. So with that, we are going to show you here a quick sample on how the process flows.

Step 1: Select Data to Recover and Storage

Download and then have the FoneDog Data Recovery installed on your Mac. Once done with that, launch the program to start using it. Then, once that you get on the main page of the tool, simply choose the type of data that you would like to recover. And also, on the same page, choose the location of the data where it has been deleted.

Recover Deleted Data On Mac

Step 2: Do A Complete Scan on Mac

After choosing all the needed information, the next thing that you should do is to have your Mac scanned by the FoneDog Data Recovery. For the scanning process, there are two ways on how the program can scan your Mac. One is through a Quick Scan which can take only a few minutes. The other one is through a Deep Scan which can take a longer time to complete. But it can definitely give you more items that you can recover as a result.

Recover Deleted Data On Mac

Step 3: Check Your Scanned Data and Choose to Recover

After the scanning process, you can now go ahead and choose the data that you want to recover. By doing this, the FoneDog Data Recovery will allow you to preview your scanned data. This way, you will be sure that you are going to select those data that you really want to get back.

Recover Deleted Data On Mac

Step 4: Recovery Your Chosen Data

And once that you are done choosing the items that you wish to get back, you can now go ahead and process recovery. In order for you to do this, just click on the Recover button found at the lower right corner of your screen. Then wait for the program to complete the recovery process of your deleted data on Mac.

Part 2: How to Recover Deleted Data on Mac Using Recycle Bin

The easiest way for you on how to recover deleted data on Mac is by taking advantage of its Recycle Bin folder. This is because every file that you have deleted on your Mac, whether you have dragged it to your trash or by clicking on the delete button, they can all be found in just one folder which is the Recycle Bin.

Data that was put on your Recycle Bin can still be restored with just a few clicks.

  • Step 1: Launch your Recycle Bin on Mac.
  • Step 2: Locate on the file or data that you want to restore.
  • Step 3: Then right-click on the data and then choose the option Put Back. This will then recover your chosen data back to the original folder where it has been deleted.

Part 3: How to Recover Deleted Data on Mac Using Time Machine

In some cases, there are those users who try to empty their trash now and then. This means that once that you have deleted all the items that you have on your Recycle Bin, then you can no longer recover them using the method above.

Good thing is that there is also another way for you to recover those deleted data using a built-in feature on your Mac. And this is by using the Time Machine Backup files. And to show you how you can do that with this method, here is a quick tutorial that you can follow.

  • Step 1: Go ahead and click the Spotlight option which can be found at the upper right hand of your Mac. Then enter Time Machine for you to locate and launch it.
  • Step 2: Then, from the page of Time Machine, go ahead and choose the folder where you have lost your data that you want to recover.
  • Step 3: After that, go ahead and hit on the arrow up button which is located at the right part of the Time Machine page. Then go ahead and check out all the backup files shown on your screen and then choose the one that you would like to recover.
  • Step 4: Once done, simply press and hold the Command button and then select on the file that you want. After that, click on the Restore button for you to recover deleted files on Mac using the Time Machine.
Recover Deleted Data On Mac

Part 4: How to Recover Deleted Data on Mac Using Undo Options

There are also some Mac users who are very tidy that they always deleted those files that they no longer need from their Mac. This way, they can keep their Mac clean while they are using it. And because of that, there are some people who lose their data because they have accidentally deleted it.

If you have this same case, then you have the option for you to recover that deleted data right after you have accidentally deleted it from your Mac. And this method is by using the Undo option. You can have that file be restored on your Mac immediately right after you have accidentally deleted it. However, this will not work if you have already emptied your Recycle Bin.

Part 5: How to Recover Deleted Data on Mac Using Terminal

Another feature that you can use on your Mac is its Terminal app. This is an app wherein it is considered to be a direct interface to your OS X. That is why you can make use of it if you want to restore deleted data on your Mac computer. And in order for you to know on how you can use this, here is a quick process that you can follow.

  • Step 1: Go ahead and navigate to your Applications and then click on Utilities for you to be able to launch your Terminal app.
  • Step 2: From there, go ahead and key in the Unix code: cd .Trash and then tap on the Return button n your keyboard.
  • Step 3: After that, type in mv name ../ and then press the Return button again. In this command, you can change the command “name” with the name of the file that you would like to recover.
  • Step 4: After that, type in Quit after you have recovered the data that you want and to close the Terminal app on your Mac.
Recover Deleted Data On Mac
Conclusion

As you can see, there are definitely a lot of ways on how to recover deleted data on Mac. The only thing that you need to do here is to choose which of the following is suitable for what you really need. However, if in any case that you want to do this process the easiest and the fastest way possible, then you might as well use the FoneDog Data Recovery to get back those deleted data on your Mac.

Do we need to get kids their own Headphones?

Bluetooth headphones for kids

Kids these days play a lot of video games and the noise coming from the console creates a bit too much irritation. Whether it’s a continuous battle scene or a car racing, the sound continuously hitting our eardrums causes a great deal of frustration.

Most of us prefer to hand over the kids a gaming device so they stop coming back to us and remain engaged themselves. It is a bit on the negative side of the attitude of parents but it is still prevalent. Now, with kids enjoying themselves with these mobile phones and gaming consoles, a problem of noise pollution arises in the home.

Kids do have a tendency to get too much involved in the gaming environment and he is already not listening to your shouting that says to keep the volume low. The only solution we can find for your mental peace is you need to buy the latest Bluetooth headphones for kids.

Bluetooth Headphones for Kids? Are you kidding me?

Even talking about Bluetooth headphones for kids is insanity, right? It might have been the case but now specialized headphones are designed for the usage by young ones. You might be worried about the hearing capabilities being affected in the long run but it is no more the concern.

You get to set the maximum sound intensity they can hear through Bluetooth headphones. Most usually it is set to 85db as recommended by the experts so, you’ve got rid of this concern quite easily. Next, you need to prioritize how effective these Bluetooth headphones can be used.

It is quite a pity that we don’t optimize the use of technology for the kids. Handing over to them the mobile phones and other gadgets is solely to avoid giving attention to them. There are some great learning opportunities over the internet, and if you prioritize those personalized lessons for kids, BlueTooth headphones for kids can come quite handy.

They can listen properly to the poems, interactive stories and build a more deep sense of the things evolving around them. The material has always been there at the platforms but we are not including them in our priority.

Since the negative impact is more commonly observed, we get deceptive about something that is really helpful. In the end, if we analyze, it would be our own attitudes to be blamed. At a young age, there is much higher curiosity and we need to set the right triggers for them.

Obviously, you can’t hand over the things without effective monitoring, you still need to keep your eyes open. We have to use these online platforms to their maximum potential. Most of the things are free for us to consume and it can be a great way to build a foundation. Kids would get to know about the use of technology in a more positive way and guided exploration will prevent them from going astray out of curiosity.