When using Windows, temporary files are often created and remain undeleted. In addition, many files are created without the user’s knowledge, such as Internet Explorer (IE) caches, cookies, and files containing history information of various applications. Some of these files include those that become unnecessary when the work is completed, and those unnecessary files should be deleted from the viewpoint of privacy protection. Also, if you have a PC with a small amount of disk space, you can increase the amount of free disk space by deleting them. Resulting in a well-optimized PC too.
PC optimization extends the life of your PC and prevents viruses, bugs and malware from infecting your important data. It is very effective in increasing the speed of your computer and increasing your business productivity.
Unnecessary files can be deleted with the Windows Disk Cleanup tool, but different caches and application history information files must be deleted individually. Tools that can collectively delete such unnecessary files are called PC Cleaners. It performs multiple tasks such as clearing caches of various programs, deleting corrupted registry files, finding and deleting temporary files, etc. You can restrict various processes from using RAM in the background.
Too many start-up items and a bloated cache can slow down your PC, so you should run PC Cleaner regularly to identify problem areas. So, here is a list of top 3 PC Cleaner applications.
Advanced SystemCare
Advanced SystemCare is software developed by IObit that optimizes and speeds up your computer for all Windows series. 16 years have passed since the first release in 2004.
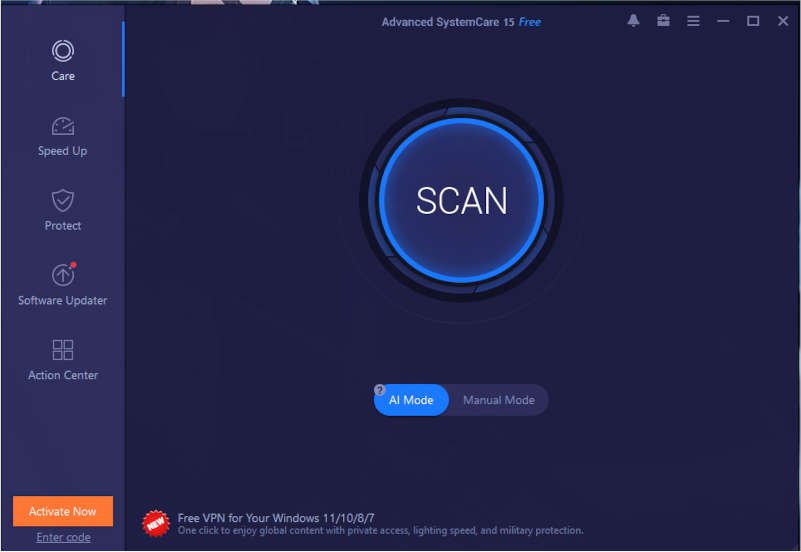
Advanced SystemCare is a smart system cleaning and optimization tool that can remove junk files in a hassle-free way. This all-in-one software tool scans, repairs, enhances and optimizes the performance of your entire system, including your internet connection. As digital devices, computers are prone to errors and problems.
There are also some features that protect your privacy by deleting sensitive information after you close your web browser. IObit developed Advanced SystemCare to meet every user’s need to fix their system for better and non-stop performance.
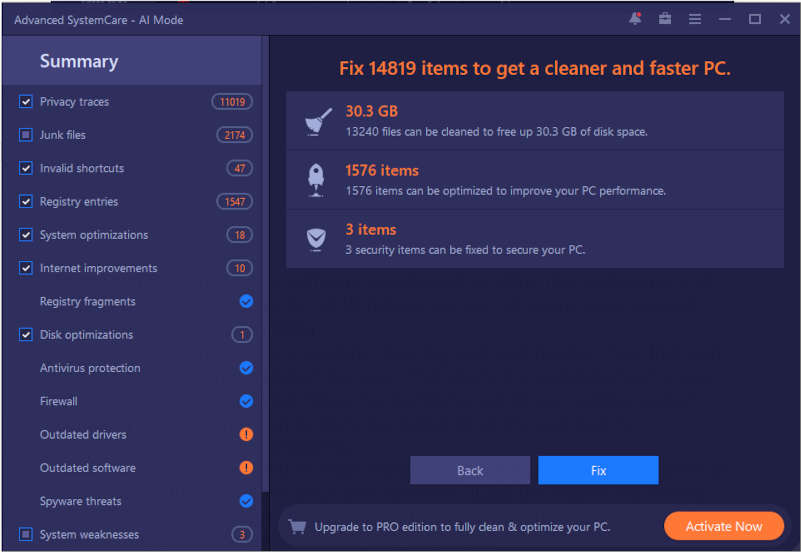
It has two modes for scans AI mode and manual mode. AI Mode can clean and optimize your PC intelligently. In Manual Mode, 16 modules are listed, and you have to manually select the modules you want to clean and optimize.
Features:
- Advanced SystemCare is an easy-to-use computer cleaning software with an easy user interface.
- Thoroughly clean junk files on your PC
- Easily solve Windows errors with features such as Winfix, Disk Doctor, etc.
- Provides comprehensive protection for your PC with features like antivirus, firewall protection, browser ad blocking, and email protection.
- Helps you to remove spyware.
- It can perform startup and network optimization, delete junk files, repair redundant shortcuts, clear browsing data, and more.
- This free PC optimizer checks for outdated system drivers
- Helps in RAM optimization.
- The functionality of this application can be extended by adding plugins such as IObit Uninstaller, Driver Booster, Smart Defrag, etc.
- Displays a desktop widget with real-time data on RAM and CPU usage.
CCleaner
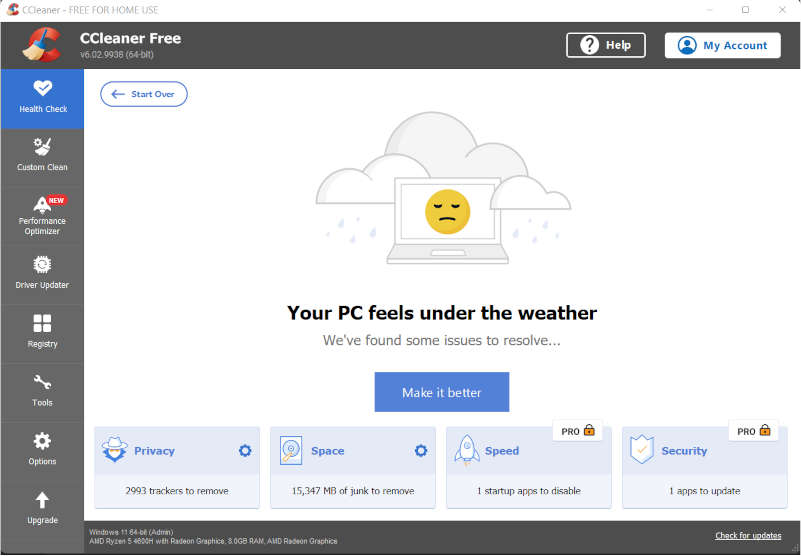
CCleaner is probably the most popular Windows cleaning tool out there. Not only Windows, but this software also works on macOS.
Despite the popularity of this PC optimizer tool, its use is becoming more and more sceptical as some features like Active Monitoring can make users question the privacy aspects. Piriform has taken certain steps to solve these issues. When using it, though, you should know what options are enabled in the settings.
Features:
- Easy-to-use application that analyses junk data on your computer and deletes it quickly.
- Users can configure the types of data that PC cleaning software should remove during the process.
- Smart cookie scanning keeps logins intact while clearing browsing data.
- The free version includes features that work well in most cases.
- Users can exclude specific folders from the cleaning process.
- Receive regular software updates, but the free version does not update automatically.
- The smart cookie scanning feature may raise privacy concerns for some users.
Restoro
Restoro is an all-rounder system solution that can completely optimize any Windows system. It can perform PC scans and assessment. It can replace damaged Windows files. This will restore your PC’s maximum performance.
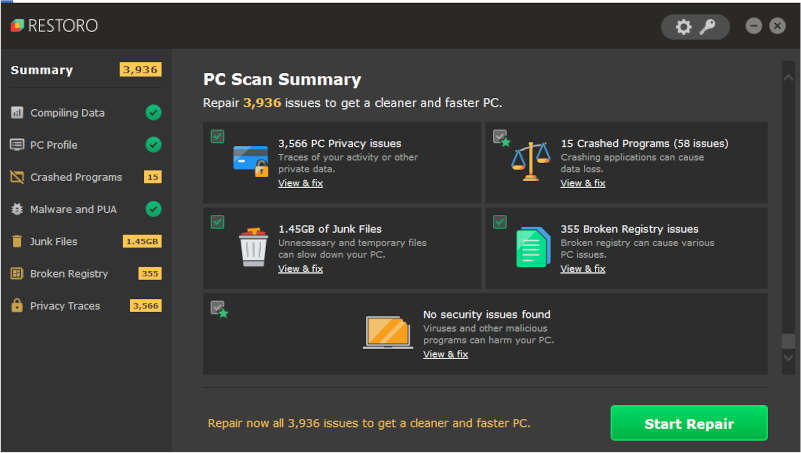
Restoro can replace missing Windows files with healthy files.It can also perform a hardware scan. Restoro responds to everything that can be expected from a program to clean the computer. With the free version, you can scan the device for many issues, including malware. You can then validate the deletion of suspicious files (viruses, spyware).
However, only paid options provide access to real-time monitoring and repair tools. As its name suggests, Restoro can therefore replace damaged files and can even restore your operating system. It takes a long time to complete the first scan.
Features:
- It can scan an remove unnecessary files and free up disk space.
- Restoro can perform threat application detection in real time.
- Windows registry optimization by replacing the damaged or missing Windows files
- Hardware analysis to check whether all the components are working well
- Antivirus and Antimalware to protect your PC from various attacks
- Stability and privacy issue detector to show you all the risks
With these tools, you can easily improve your PC’s performance by freeing up space and removing unnecessary files. The temptation to purge your PC every day is great, but you should resist it for both security and performance reasons. On the one hand, each cleaning increases the risk of deleting files that are essential for the proper functioning of the system. On the other hand, unnecessary files such as cache files end up being more valuable than they seem. In reasonable numbers, they act as system accelerators. So, removing them daily will slow down your PC. So, use the above-mentioned apps only when needed.